Home

Bear minimum to edit uniform colors for noobs

This is a discussion on Bear minimum to edit uniform colors for noobs within the Madden NFL Football PC forums.

Go Back   Operation Sports Forums > Football > Madden NFL Football > Madden NFL Football PC
EA Sports College Football 25 Gameplay Deep Dive
Operation Sports Is Looking to Hire a Freelancer Specializing in Racing Games
Is Caitlin Clark in NBA 2K24?
Reply
 
Thread Tools
Old 03-26-2019, 04:14 AM   #1
MVP
 
ForUntoOblivionSoar∞'s Arena
 
OVR: 0
Join Date: Dec 2009
Bear minimum to edit uniform colors for noobs

This is not an in depth tutorial. It's simply to get a complete noob in the door. You have to experiment to learn. I just started, and barely have gotten anywhere, but I figured I'd share what I have learned in the few hours since I bought the PC version of the game.


The absolute bare minimum to edit uniforms (much more can be done, but this will help you get started on trial and error):


(1) First, get Frosty, install it, etc. There are quality tutorials on that. Look at TheBleedingRed21's especially. He has two excellent ones. The first one walks you through the installation and configuration.


(2) Next, after you've installed and opened Frosty, go to the following location:


content > characters > player > parts > uniforms > (team name) > year > double click on the year folder.


(3) When you double click on the year folder, a bunch of uniform assets for that year will be listed. The ones you can edit using what I'm telling you here are only the ones of the type "TextureAsset," and only the ones that say "col" (which means color).


(4) Double click on the Texture Asset you want to modify (for example, red_jersey_1994_red_jersey_col).


(5) A window will appear. At the top left of that window will be links labeled "Export" and "Import." Click Export, which will save it to a destination on your computer. Note! For safety reasons, I am duplicating that file every time in a different folder, which I named "Uniform backup," in case I screw everything up and want to return the original uniform where it belongs. I have one folder to save my edits and one to save the originals (I just copy the newly saved file and paste it in another folder). I am not changing the file names. As I said, I've been at this for a few hours, so I'm not messing with anything but colors.


(6) Open the file with a graphic editing program like GIMP or Photoshop (I use Gimp). Edit the file, but pay attention to how it is laid out. Changing colors is easy, but if you add any logos or stripes you have to be careful or it will look stupid.


(7) Save the new file (in GIMP you Export it as a png).


(8) Go back to Frosty and now click the "Import" button. Then select your edited uniform piece. Then launch the game and test.


Keep in mind you don't want to be importing one file to a different one. If you exported a pants file, by god import a pants file, and to the exact same location. I haven't tried not doing that, but it seems to me it would obviously end in disaster.


Here is what I did in my first couple of hours messing around with it. It is not that difficult. I have no idea how to edit helmets yet, nor do I know how to edit numbers, so you'll be wasting your time if you ask, but at least jerseys and pants are easy enough.


Hope this helps.
__________________
Quote:
Originally Posted by Therebelyell626
I am going to create a team called "the happy town fundament rapscallions" and hurt your already diminishing image
https://forums.operationsports.com/forums/showpost.php?p=2049813056

Last edited by your mom; 06-06-2006 at 6:06 PM.
ForUntoOblivionSoar∞ is offline  
Reply With Quote
Advertisements - Register to remove
Old 03-26-2019, 04:48 PM   #2
Rookie
 
Whitemammoth04's Arena
 
OVR: 0
Join Date: Jul 2017
Re: Bear minimum to edit uniform colors for noobs

Using GIMP, how to I edit the bin files, do I convert them, or what. I'm a little lost.
Whitemammoth04 is offline  
Reply With Quote
Old 03-26-2019, 08:43 PM   #3
MVP
 
ForUntoOblivionSoar∞'s Arena
 
OVR: 0
Join Date: Dec 2009
Re: Bear minimum to edit uniform colors for noobs

Quote:
Originally Posted by Whitemammoth04
Using GIMP, how to I edit the bin files, do I convert them, or what. I'm a little lost.
No idea. Not there yet myself. I don't even know what GIMP can edit that Photoshop can, because thus far I've had no success (other then what I outlined in this thread). Been exploring various pluggins, but I've never used GIMP or Photoshop for anything other than making pretty pictures or editing .png colors.


All I know for sure is how to edit some of the uniform colors using .png files with GIMP.


I do not expect anyone here is going to go into much detail on using the tools in any depth, from Frosty to graphic editing software. The ones who don't know would love to help you, but don't know how, and the ones who do tend to not want to waste the time except when they make their own tutorial videos on youtube and the like. That's the vibe I get anyway. Every now and then someone will drop a good hint, but there seems to be an exclusivity culture in the Madden PC community for whatever reason, one I've never seen on any other PC game or modding community.


Just to highlight some of my struggles, when I started, I was exporting files as .png, and editing their colors in GIMP. But take helmets, for example. I could find no way to access the shells. When I copy and pasted one logo from a helmet to another, the entire shell color came with it. No idea why. I know there are layers, and normal maps and such (of which I know almost nothing), and am still learning as I go. But when I export the files, the first option is .png. If I export as .dds, GIMP can't even open them, despite me having the .dds plugin (and the ability to create dds files from GIMP). Of course, my plugin is from 2013, and it's the newest I can find, and from what I understand, newer games have a new type, which means I am sol at this point.


EDIT- Will be attempting with photoshop. I'll tell you what I find after it's installed and I pull out my hair for a day trying to learn in the least efficient way possible (trial and error).
__________________
Quote:
Originally Posted by Therebelyell626
I am going to create a team called "the happy town fundament rapscallions" and hurt your already diminishing image
https://forums.operationsports.com/forums/showpost.php?p=2049813056

Last edited by your mom; 06-06-2006 at 6:06 PM.

Last edited by ForUntoOblivionSoar∞; 03-26-2019 at 09:03 PM.
ForUntoOblivionSoar∞ is offline  
Reply With Quote
Old 03-26-2019, 09:15 PM   #4
Pro
 
OVR: 4
Join Date: Sep 2004
Re: Bear minimum to edit uniform colors for noobs

Just join the discord, Guys there have figured most of this stuff and would be willing to help

https://discord.gg/Vkcpy2d
__________________
DISCORD - Madden Modding Community Discord
xSABOx is offline  
Reply With Quote
Old 03-27-2019, 03:57 AM   #5
MVP
 
ForUntoOblivionSoar∞'s Arena
 
OVR: 0
Join Date: Dec 2009
Re: Bear minimum to edit uniform colors for noobs

Quote:
Originally Posted by Whitemammoth04
Using GIMP, how to I edit the bin files, do I convert them, or what. I'm a little lost.

Okay so I've learned a few things in the last 16 hours or so.


Uniform editing in general:


(1) GIMP isn't going to do, as far as I can tell, because the dds plugin doesn't work with newer file types (or so I'm told). Get the latest version of Photoshop.


(2) In addition to Photoshop, you'll need the Intel TextureWorks plug in. TheBleedingRed21 has a tutorial on that which I believe you can find here at OS. This is needed in order to edit dds files.


(3) With those tools in hand, when you export anything to do with textures, export it as a dds file.


(4) Then you'll open Photoshop, and from Photoshop open your dds file. When you open it, select "Load Transparency as Alpha Channel." Do this every single time.


(5) Edit your file how you want.


(6) When you save it, save it as the following:
(a) First, as a "Intel TextureWorks DDS" file.
(b) After you choose the above, you'll have a lot of options pop up as the last part of your save. Save the file as what the file is labeled in Frosty (for most things it appears to be BC7_SRGB. This is extremely crucial. So in Photoshop when you save it, after selecting it as an Intel TextureWorks DDS file, you will choose these options in the three slots:
I - Texture Type: Color + Alpha
II- Compression: BC7 8pbb (Fine sRGB, DX11+)
III- Mip Maps: Autogenerate
(7) Import your file into Frosty. Again, make sure it is the correct file type.


(8) Launch the game to test.


(9) If it doesn't look right, exit and repeat the editing process. If it does look right, then you need to save it by exporting it as a mod (select "Export to Mod" under file).


(10) Use the mod manager to import and apply your mod. There are tutorials for how to do this, but it is really just two easy steps. If you've done the rest right, this will not be a problem.


Helmets!:


This one was killing me because I couldn't find the files, and had no idea that you could actually edit the parameters in the upper right windows.


Changing the color is easy. It's the same as the previous steps. But changing reflectivity and all that is a little more tedious. The key, however, is selecting the right file. Here is an example of what the file name you need to select will be:


buc_helmet_2010_pew_preset.

The file type is "AppearanceShaderPreset."


Then you have to edit the parameters, the relevant ones of which will be found in the upper right window that appears under the drop down ShaderPreset > VectorParameters.


Each one of those vector parameters has a drop down as well, and when you click one, to the right another window will list something like
VectorShadeParameter
X: 0.3 Y: 0.3 Z: 0.3 W:0
stickerReflectance
Each one of those numerical values can be edited, and each vector parameter does something different. Compare different numbers from different helmets to get what you want.


I do not yet know how to add vector parameters that are present in one helmet but not in another, but you can still do a lot with every helmet.


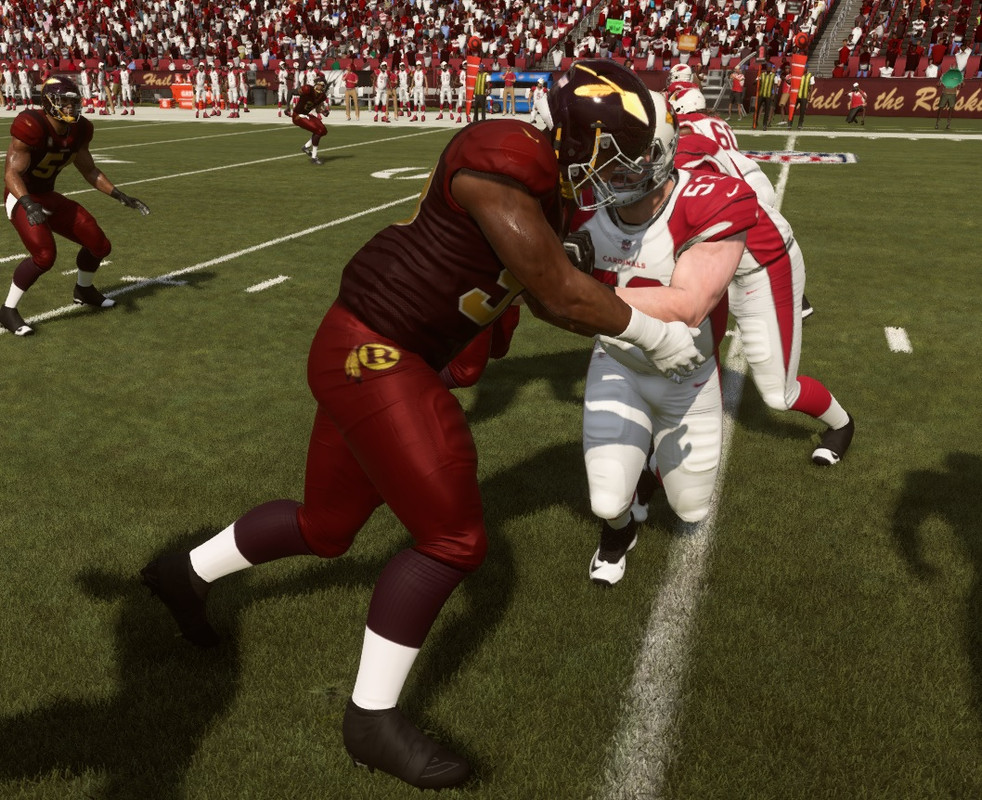
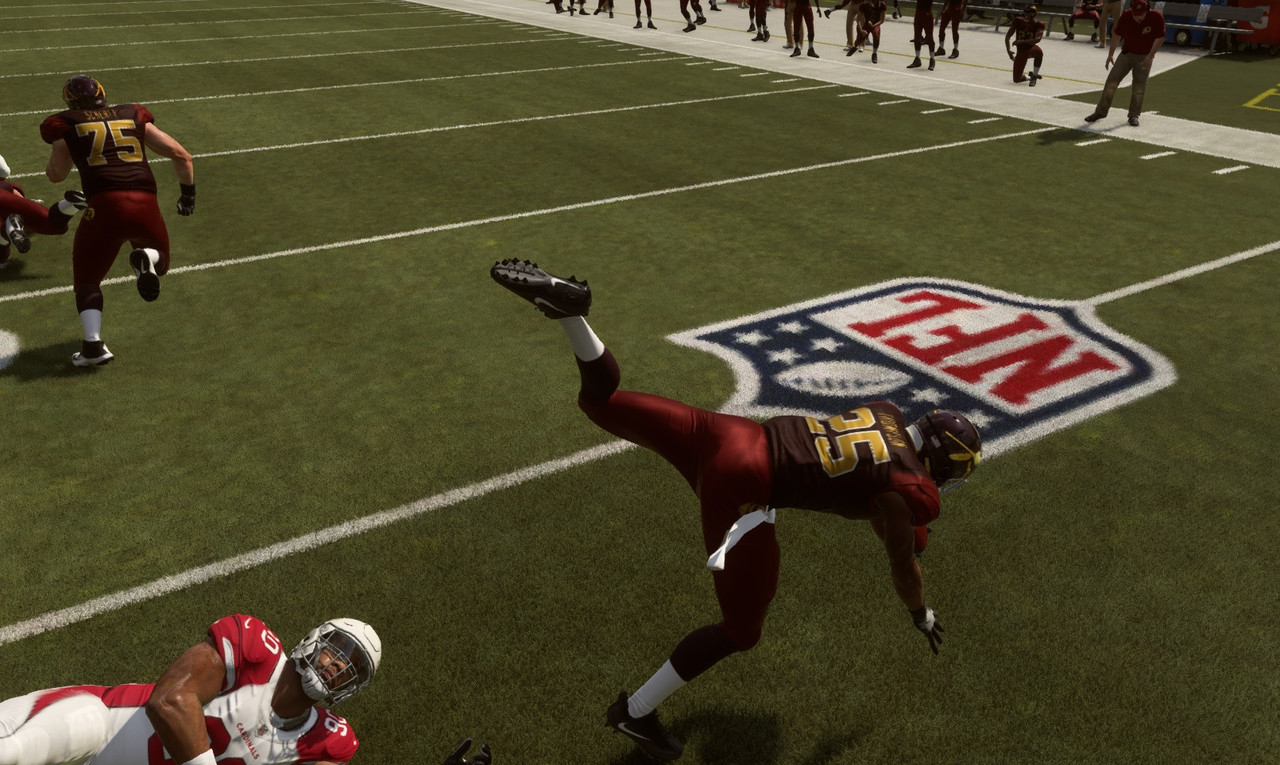
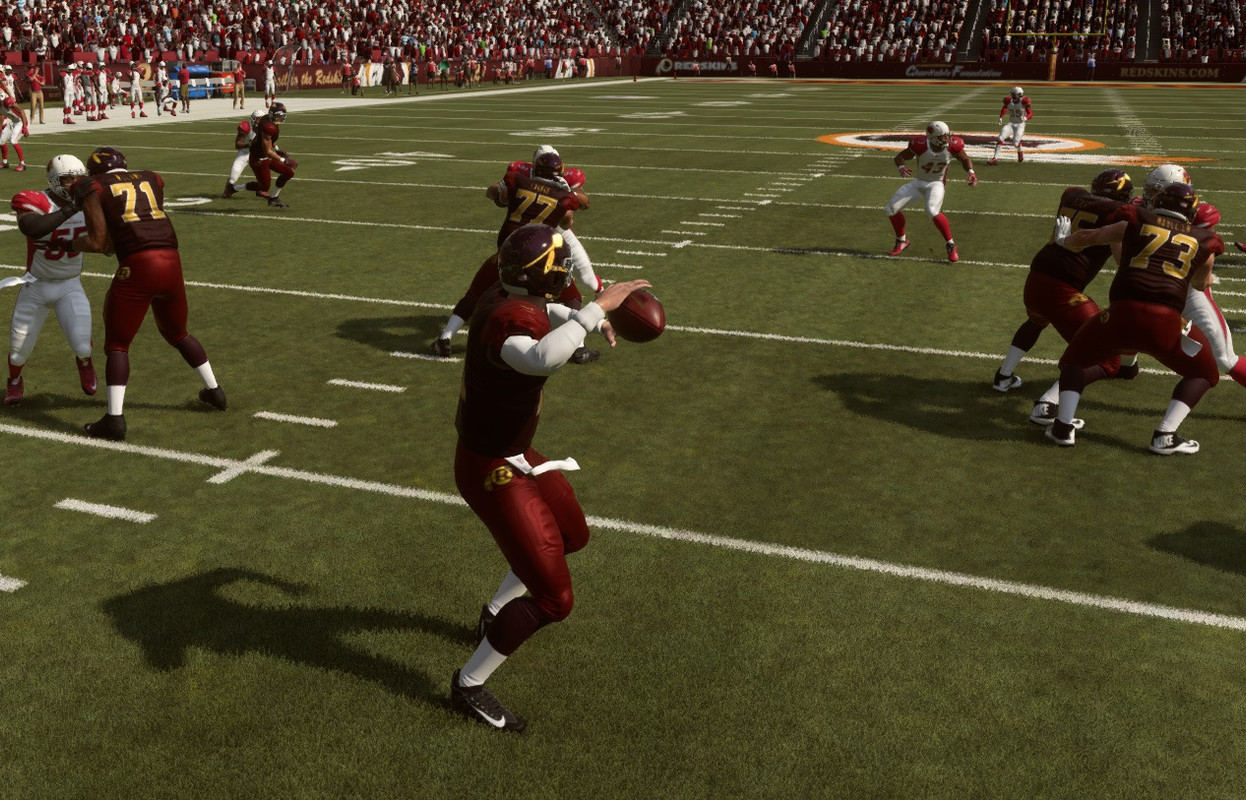
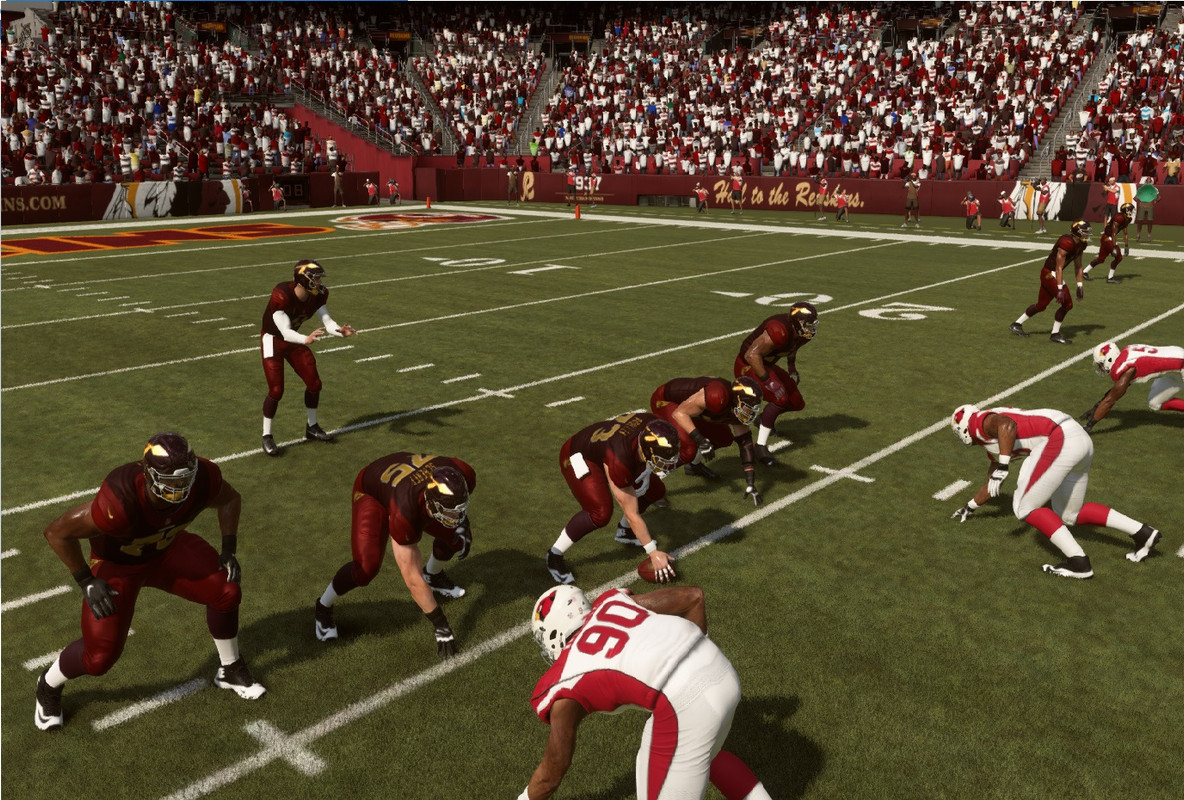
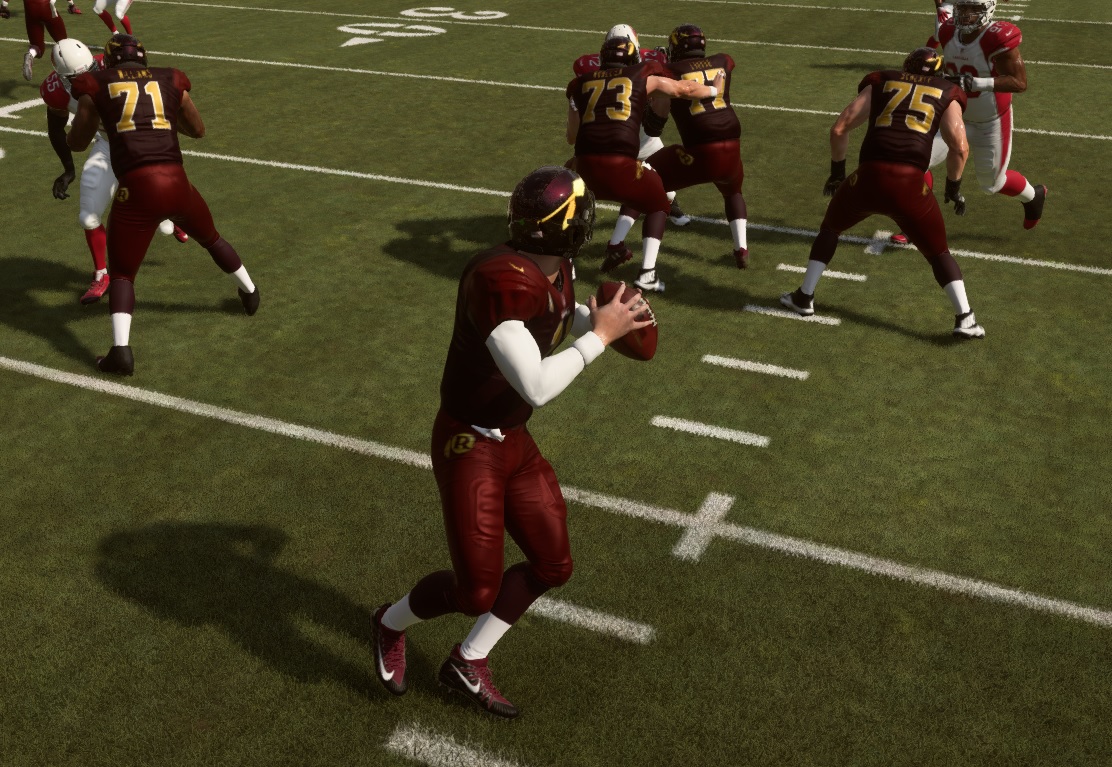
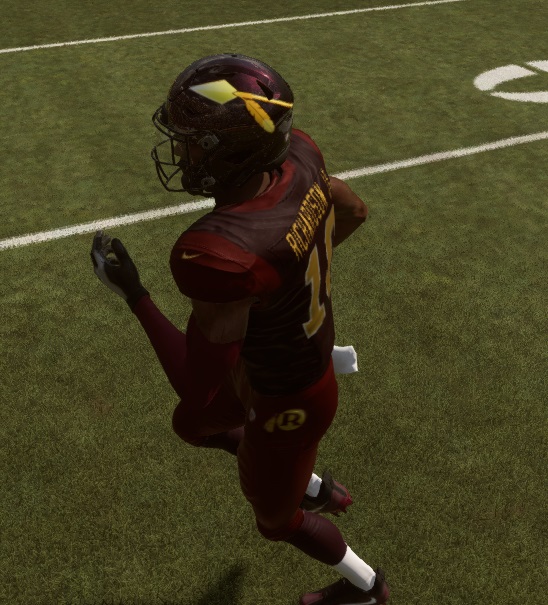
Anyway, here's what I did with the helmets on my test uniform. The first two pictures are before, the next two are after. I may go with a higher reflectivity for the sparkles or whatever, but I'm fairly satisfied for now:


For now I'm going to go with this. I might explore number editing, but it does seem to be somewhat tedious. Anyway, I hope that helps you. I'll be putting this into the first post as well.


Quote:
Originally Posted by xSABOx
Just join the discord, Guys there have figured most of this stuff and would be willing to help

https://discord.gg/Vkcpy2d

Thanks xSABOx. I did find some useful stuff there. But now that you post here, I'm more interested in your mod. I saw you made the Revival one. That's more of an overhaul, right?
__________________
Quote:
Originally Posted by Therebelyell626
I am going to create a team called "the happy town fundament rapscallions" and hurt your already diminishing image
https://forums.operationsports.com/forums/showpost.php?p=2049813056

Last edited by your mom; 06-06-2006 at 6:06 PM.
ForUntoOblivionSoar∞ is offline  
Reply With Quote
Advertisements - Register to remove
Old 03-27-2019, 07:52 AM   #6
Rookie
 
OVR: 0
Join Date: Mar 2019
Re: Bear minimum to edit uniform colors for noobs

Could you explain a bit better how to change helmet color, I don’t understand and don’t know what file to export
rickteousness is offline  
Reply With Quote
Old 03-27-2019, 08:16 AM   #7
MVP
 
ForUntoOblivionSoar∞'s Arena
 
OVR: 0
Join Date: Dec 2009
Re: Bear minimum to edit uniform colors for noobs

Quote:
Originally Posted by rickteousness
Could you explain a bit better how to change helmet color, I don’t understand and don’t know what file to export
Sure. To edit helmet color, you need to export the one whose type is "Texture Asset" and ends in col. It is three files above the circled one in the picture below. Again, you'll need to save this as DDS and edit it in photoshop. When in photoshop, you'll see the logos and stripes and a background. Just flood fill the background to whatever base color you want. But there is a more important step: the reflectivity and other qualities of the shell.


This picture should explain reflectivity and stuff. If not, feel free to ask away. Note: This is to modify the shell and its properties. If you want to mess with the logos, you'll need to look at the Texture Asset that says "col" instead of "preset."


__________________
Quote:
Originally Posted by Therebelyell626
I am going to create a team called "the happy town fundament rapscallions" and hurt your already diminishing image
https://forums.operationsports.com/forums/showpost.php?p=2049813056

Last edited by your mom; 06-06-2006 at 6:06 PM.

Last edited by ForUntoOblivionSoar∞; 03-27-2019 at 08:19 AM.
ForUntoOblivionSoar∞ is offline  
Reply With Quote
Old 03-27-2019, 08:21 AM   #8
MVP
 
ForUntoOblivionSoar∞'s Arena
 
OVR: 0
Join Date: Dec 2009
Re: Bear minimum to edit uniform colors for noobs

Additional note: Changing the color and/or logo requires exporting the file. In the picture above, you'd be exporting nin_helmet_2010_gol_helmet_col.


You will not export anything to change the reflectivity or other properties of the shell. That is done as described in the picture in my previous post.
__________________
Quote:
Originally Posted by Therebelyell626
I am going to create a team called "the happy town fundament rapscallions" and hurt your already diminishing image
https://forums.operationsports.com/forums/showpost.php?p=2049813056

Last edited by your mom; 06-06-2006 at 6:06 PM.
ForUntoOblivionSoar∞ is offline  
Reply With Quote
Reply


« Previous Thread | Next Thread »

« Operation Sports Forums > Football > Madden NFL Football > Madden NFL Football PC »


Posting Rules
You may not post new threads
You may not post replies
You may not post attachments
You may not edit your posts

BB code is On
Smilies are On
[IMG] code is On
HTML code is On
Trackbacks are Off
Pingbacks are Off
Refbacks are Off


All times are GMT -4. The time now is 09:26 AM.
Top -